
“Printed booklets” product is probably a trendy type of products because they can be used for so many business needs! They can help you spread the word about your business. They are a relatively economical solution for your marketing needs. Being such a product in demand, therefore right to sell for printing companies, it is no wonder that all players in the printing industry are offering them.
Probably you are using WooCommerce already and also wondering how to configure your “Printed booklets” product properly. No doubts you need at least one custom option where customers can choose the number of copies. Of course, you could have more custom options so that you could add more customisation parameters, like “inside ink”, “cover ink”, “booklet size”, “paper type” etc. This is where Uni CPO plugin is a particularly handy option for your needs! Our demo product that is called “Printed Foamex Signs” (https://cpo.builderius.io/product/foamex-printing-foam-board-printing-printed-foamex-signs/) gives an impression of how those extra options may look like. For the sake of simplicity, in this article, I will be using only one extra option that gives customers the possibility to choose the number of copies of the booklet and directly impacts the price calculated.
Let’s assume we have a “Printed booklets” product where its price depends on the number of copies ordered, but also has a base price of £82 and 50 copies included. Each additional copy up to 100 costs 0.9p, each additional copy from 101 to 250 costs 0.7p, from 251 to 500 – 0.5p, and each copy more than 501 costs 0.3p. These numbers describe our product’s essential parameters, as they directly impact the price. Such a product is particularly hard to configure because price ranges are not equal.
We are going to use a special Uni CPO plugin’s feature that is called “NOV matrices in ‘rangesum’ calculation mode” (https://moomoo-agency.gitbook.io/uni-cpo-4-documentation/usage/panel/nov#nov-matrices-in-rangesum-calculation-mode-pro-advanced). This is an advanced technique, you have to have some coding skills, but only a bit, I promise 😉
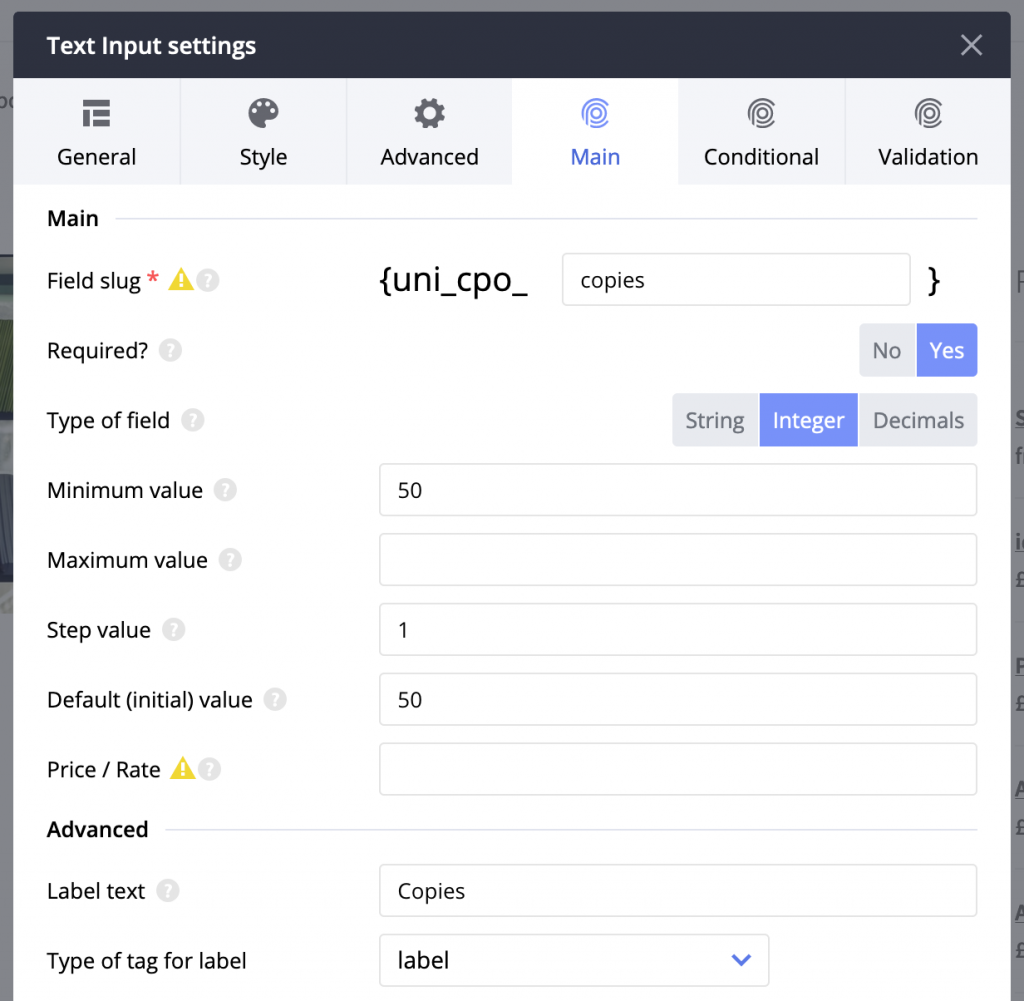
The first step is to create our custom options. Assuming you already created a new WooComemrce product that we are going to configure, I jump to the section where we add our custom option. So, add a new option type Text Input and define its settings like these:

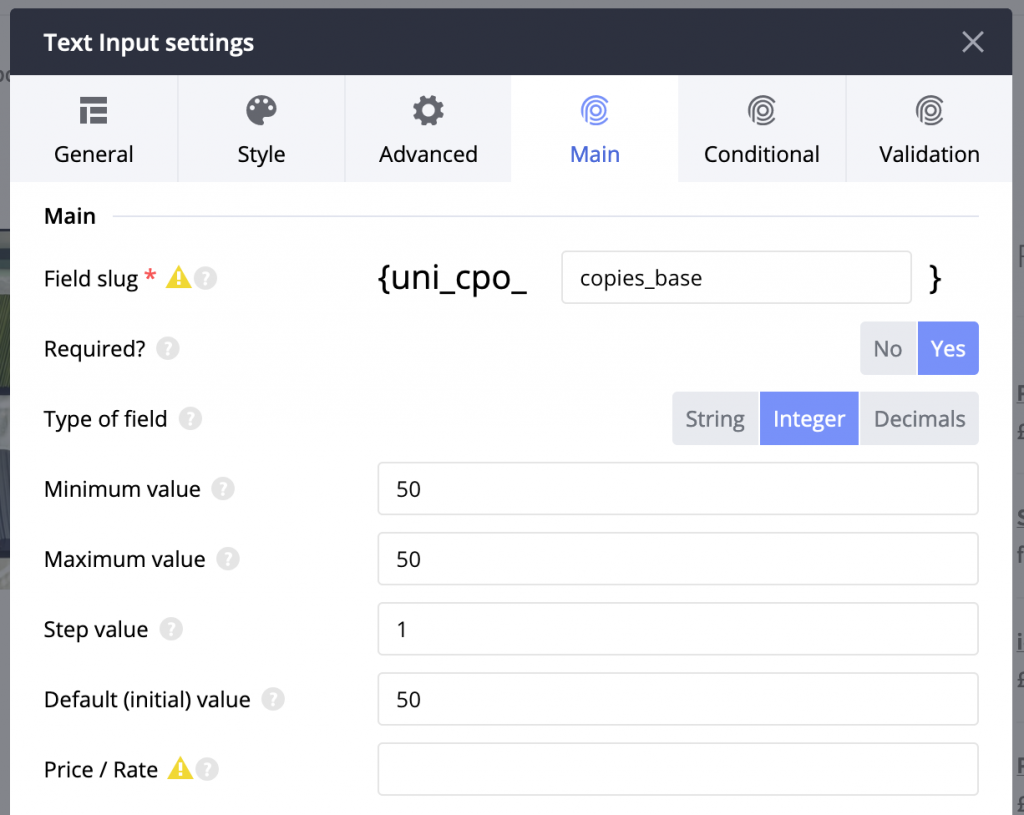
Duplicate a newly created option and define its settings like these:

For this ‘base’ option, we also add a custom CSS class.
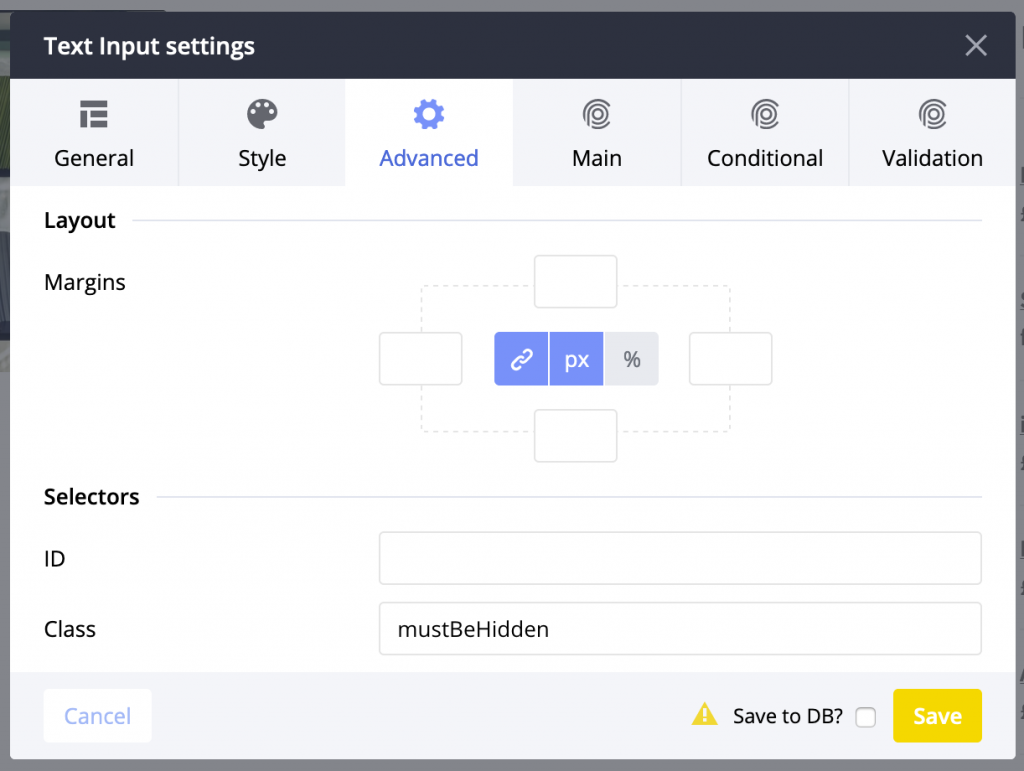

Why we need a custom class in this case? It is because we are going to hide this option, to make it protected and act as a constant. Its value must always be equal to ’50’ and customer must not change it. I will explain “why?” a bit later.
The second step is that when you have to apply some coding skills. I promised it would be easy, so keeping my promise I give the exact piece of code which should be simply pasted into functions.php file of your theme:
add_filter( 'uni_cpo_rangesum_enabled_novs', 'uni_cpo_rangesum_enabled_novs_func', 10, 1 );
function uni_cpo_rangesum_enabled_novs_func($vars) {
   $vars[] = 'uni_nov_cpo_rangesum';
   return $vars;
}
What the code above does is it registers ‘uni_nov_cpo_rangesum’ NOV to be used in the mentioned above unique functionality, to be treated differently than other NOVs. There is no UI setting to make this, and it can be done only via code.
Third, well, it is time to add ‘uni_nov_cpo_rangesum’ NOV. This is how it should be done:
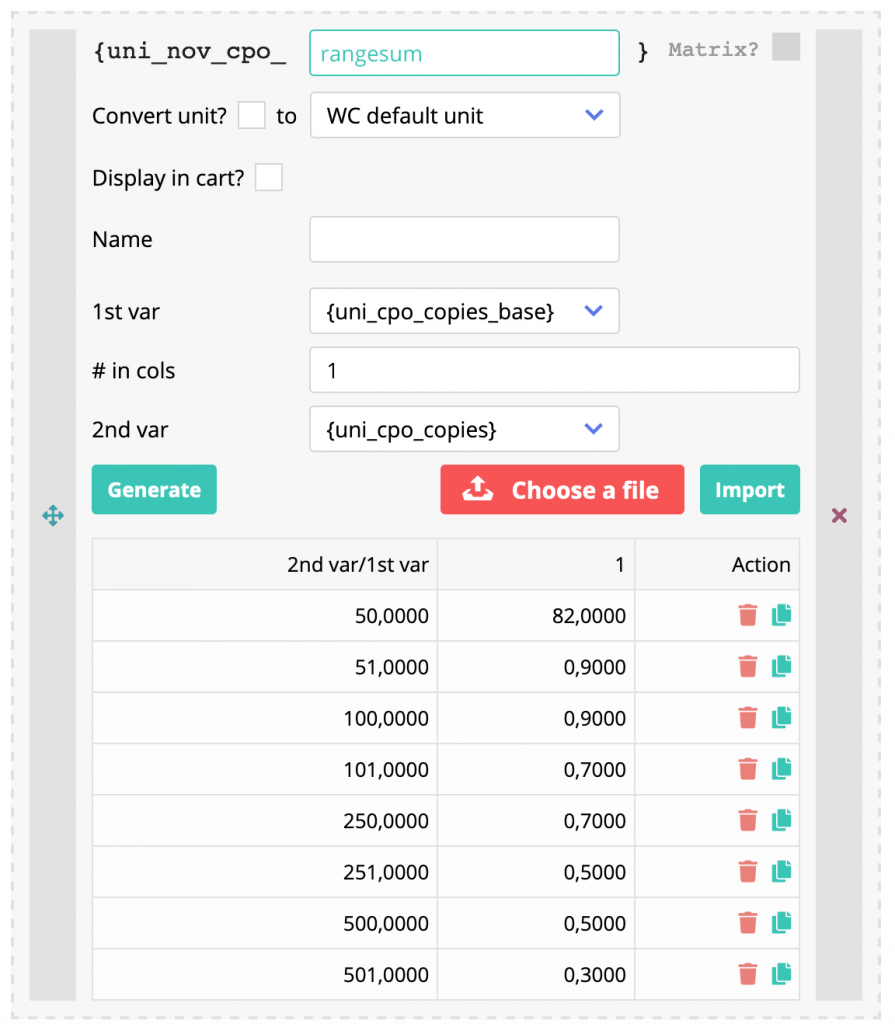
Do remember enable using NOVs; this switcher is not shown in the screenshot above, but it is located on the same modal window.
What is essential here:
Instead of using a hidden ‘base’ value as ‘from’ you could use several columns and Select/Radio option with different choices; this way first will be picked up the right column (based on the value from option defined in 1st var setting), so the prices from this column will be used for price calculation; then price will be calculated starting from ‘from’ value till ‘to’ value with prices for each piece.
Also, let’s define our main formula that will be equal to:
{uni_nov_cpo_rangesum}
That’s right, it equals to our NOV variable, and that’s all.
Fourth, we should enable the displaying of custom options and price calculation for the product.
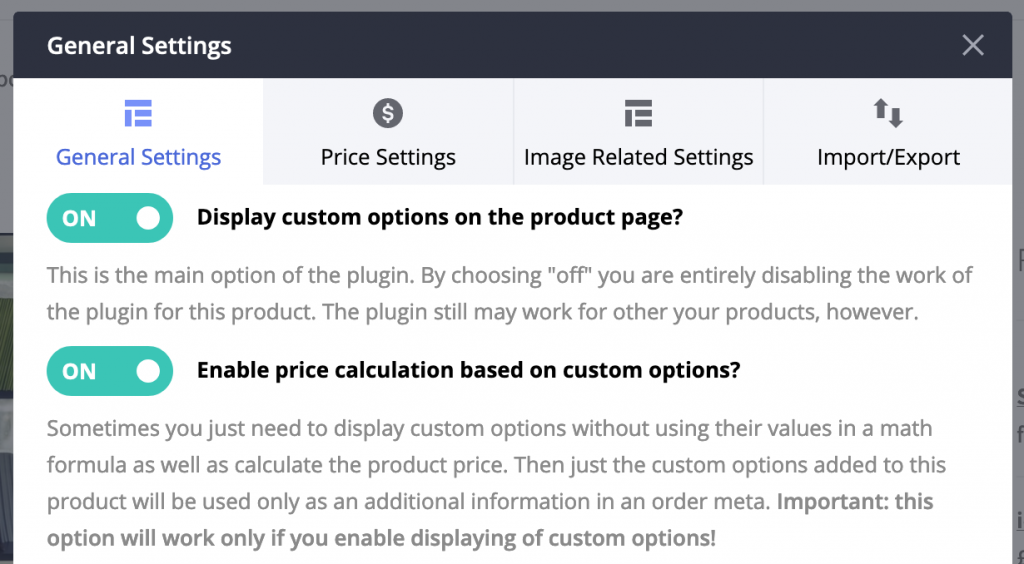
That’s a funny story I have related to these general settings. In one of the first video tutorials, I made I forgot to show that I enable the mentioned above two general settings. So, it is not in the video, and we receive a lot of questions like “I did everything like in your video, but my options are not displaying on the product page…. why?”. And this is how I know for sure that the person who asked this did not read the documentation because IT IS in the documentation but skipped in the video tutorial. Please, do not skip reading the docs; it is very important to do!
Next, remember we were adding a custom class? So, by using it, we are going to hide our ‘base’ option. Let’s open WP Customizer (I am sure you know where it is, right?) and add our CSS code:
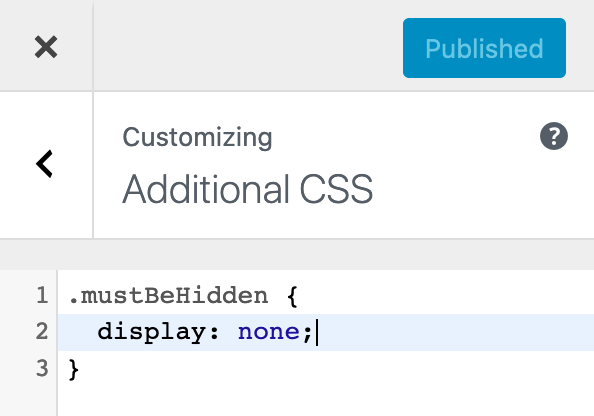
That’s all! Our product should look like this:

Let’s test how the price is being calculated. When I choose 125 copies in the option, I get this:

The price is equal to £144.50. Let’s breakdown this figure and review maths behind it. The maths formula that is silently generated in this example is this:
82+(101-51)*0.9+(125-100)*0.7
Explanation:
A thing to remember when you define ranges for this functionality: you must define the first number of the new range for which the new price must be applied.