
You may wonder what makes your product pages great. Extra custom options like a price calculator are surely a solution. But what is even better? To add a wishlist button in woocommerce custom product options!
These options in a single product page will attract customers easier than you think.
In this guide, first I will show you how to add a wishlist button in WooCommerce using MC wishlist. Then I will review the perfect integration for the MC woocommerce wishlist for having woocommerce custom product options, which is the UNI CPO plugin.
The first step to add a wishlist button in woocommerce is activating the wishlist button using wishlist button settings.
To configure this section, follow the path below.
WordPress Dashboard > MC Wishlist > Settings > Wishlist Button
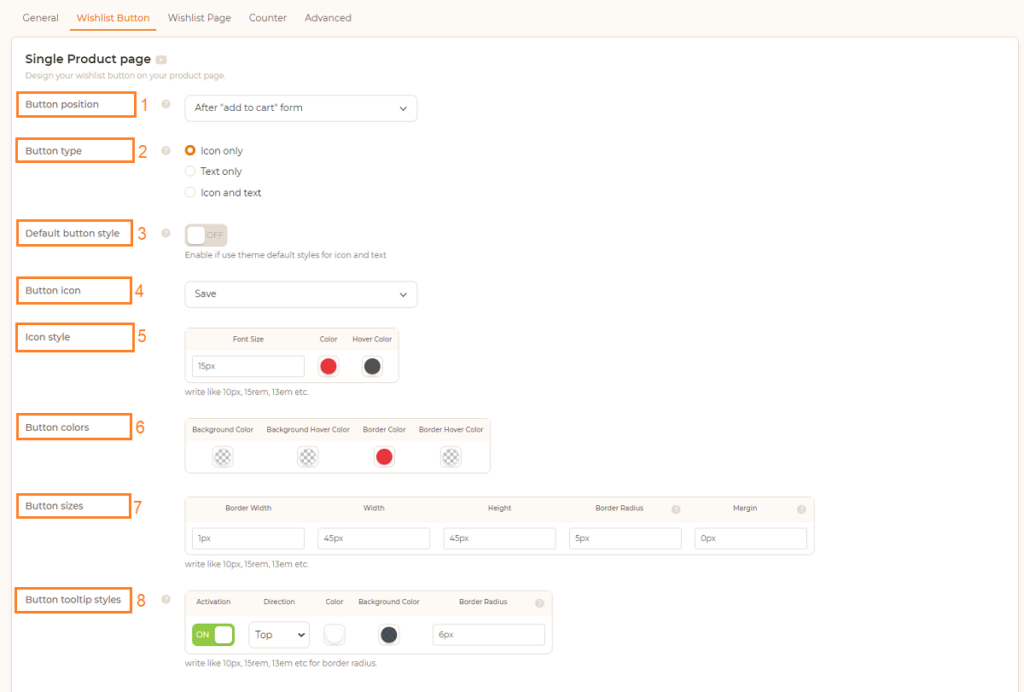
You can choose the add to wishlist button location on the single product page.
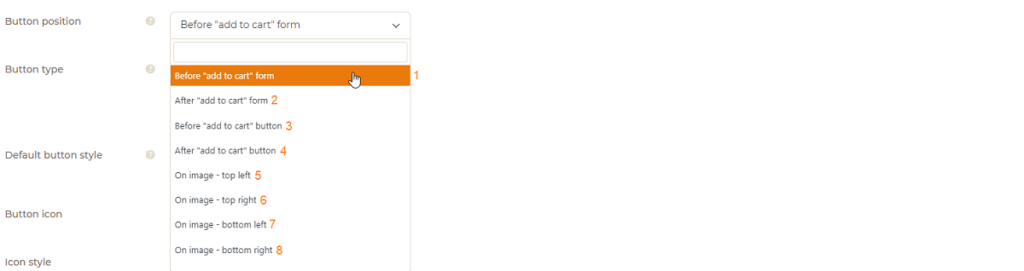
1: Before “add to cart” form
2: After “add to cart” form
3: Before “add to cart” button
4:After “add to cart” button
5: On image – top left
6: On image – top right
7: On image – bottom left
8: On image – bottom right
9: After summary
10: Use shortcode
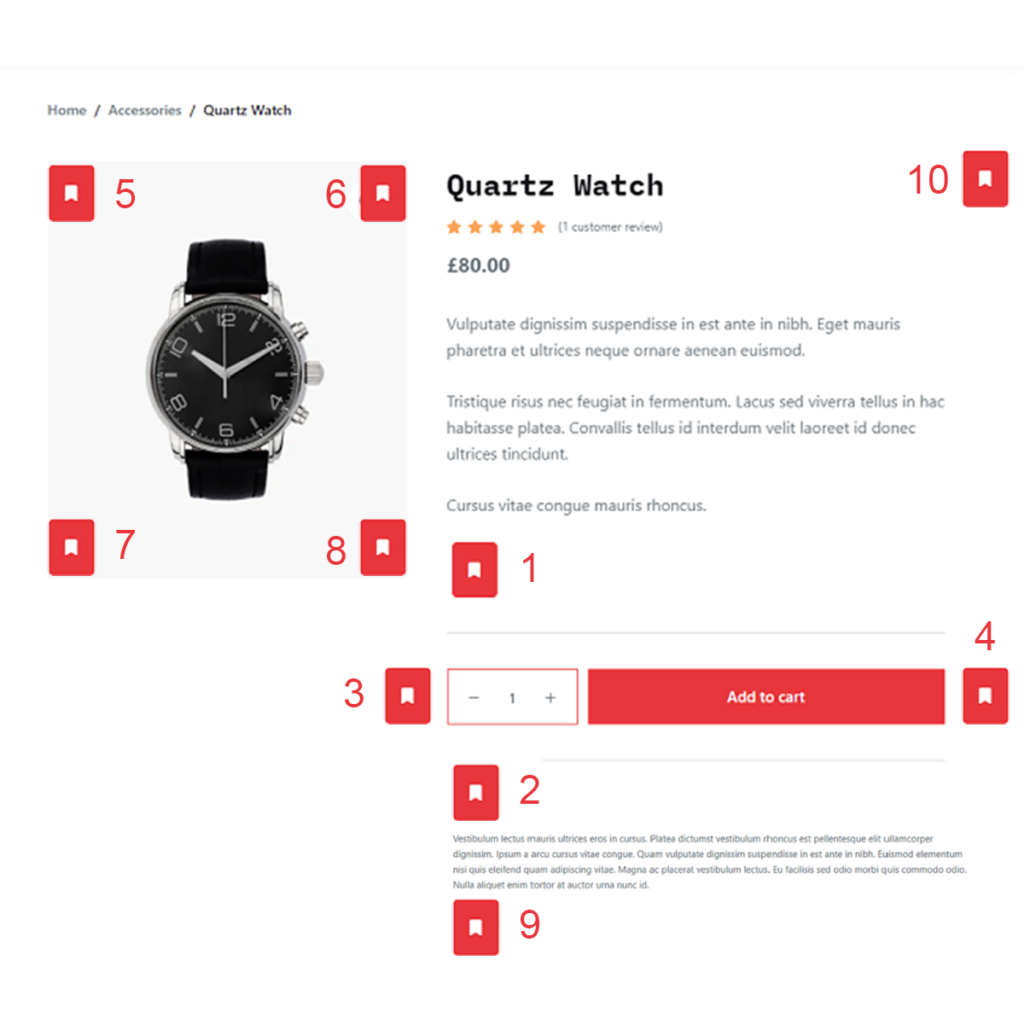
The image below shows all the possible locations to add wishlist button in woocommerce.
In this section, you can choose three types to show the add to wishlist button:

By activating this option, the add to wishlist button will have its default style according to your theme.
You can change the wishlist button icon. For this purpose, you can use the existing icons or add your own icon.
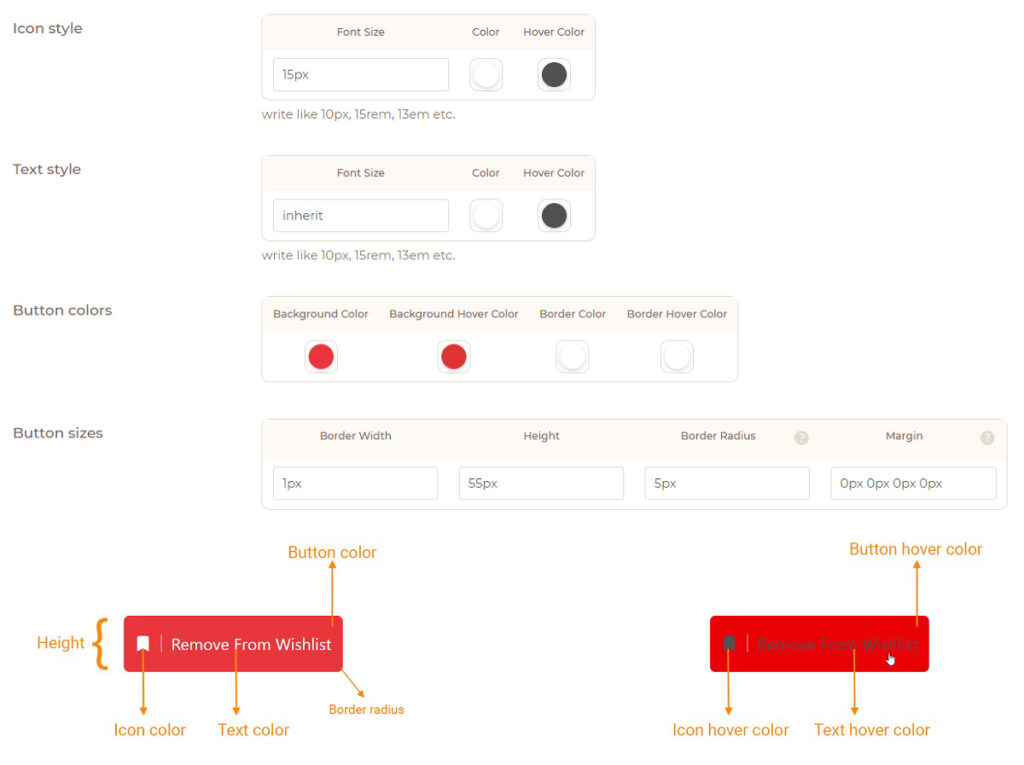
In this section, you can change the button icon size, color, and hover color.
Here, you can adjust the add to the wishlist button color.
In this section, you can also change the
You can activate the tooltip from this section and set its color as well as the color of the tooltip text and, most importantly, the direction of the tooltip (Top, Bottom, Left, and Right).

In this section, you can specify your desired text for the add to wishlist button and tooltips.
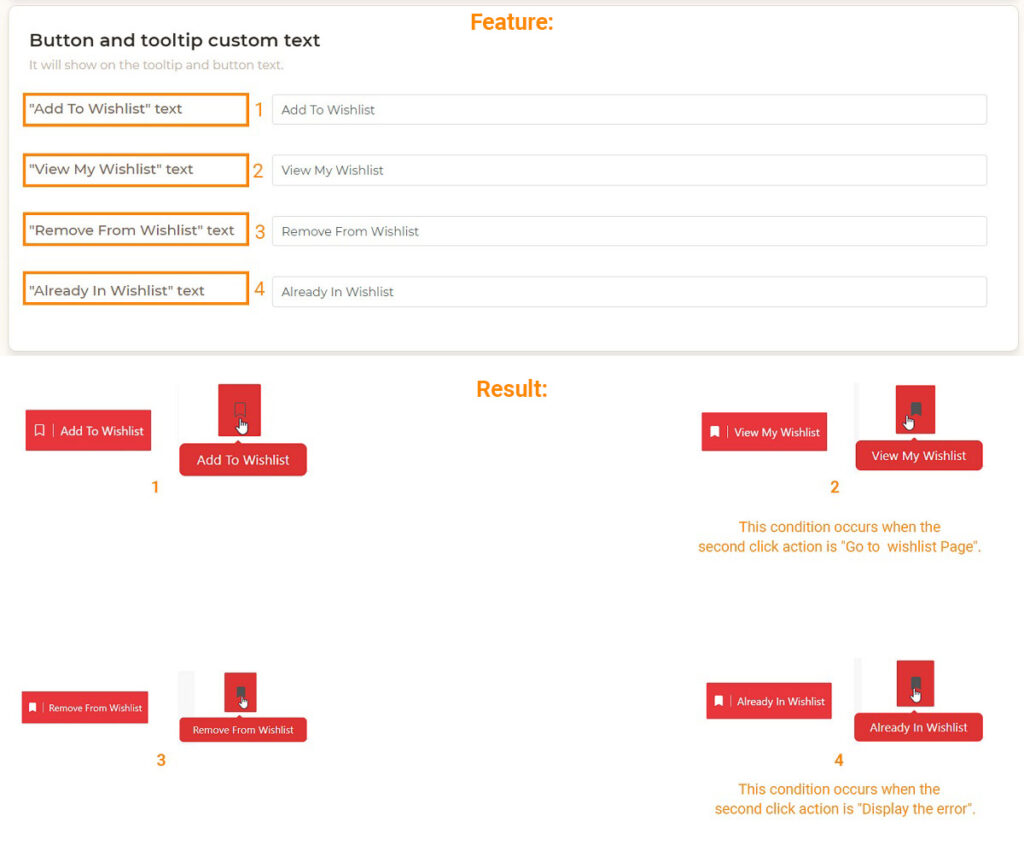
You can customize the notification text for your users by changing the text of the fields you see in the image below.
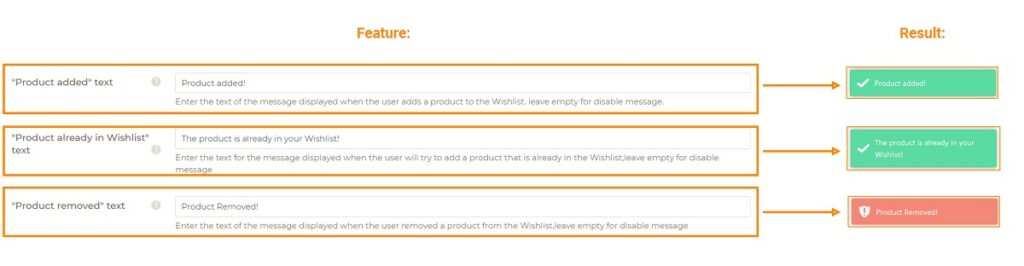
Notices that if you use pop-ups, the notifications will not work. Also, if you don’t want the notifications to work, you can leave the fields empty.
Whether you own a small clothing store or a big tech business, you need to add extra options to your product pages. WooCommerce custom product options become handy in two ways:
For your information, you can add a wishlist button in the woocommerce product page using the MC WooCommerce wishlist plugin. But you need a WooCommerce custom product options plugin for having extra product options.
The best plugin to achieve this goal is Uni CPO WooCommerce Options. This plugin has a friendly workspace and it’s easy to use. I will review the options you can set in this plugin.
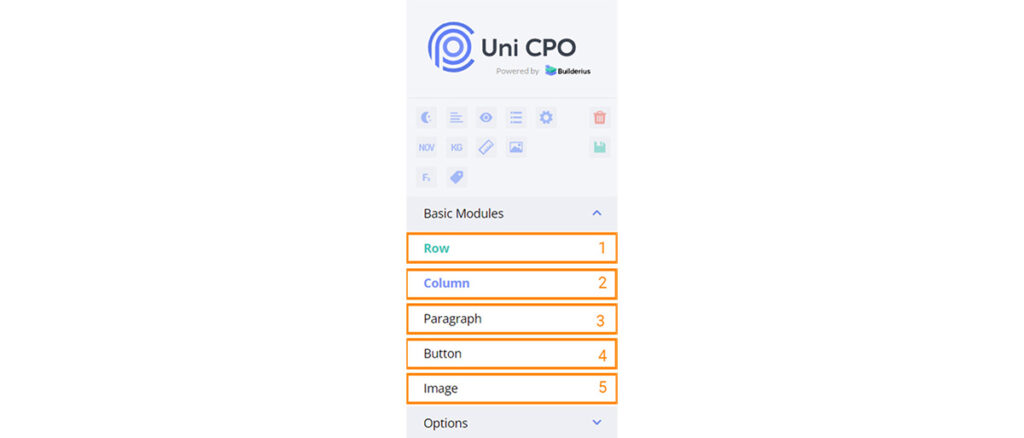
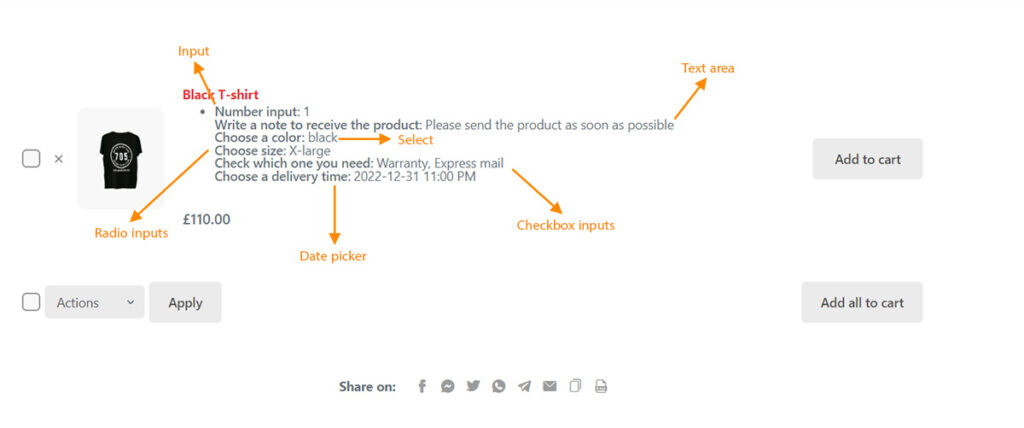
All the options that we review will include the parts that you can see in the image below.

The most useful section is the settings, which are divided into three parts.
To add any option, you must first drop a line into the box (plug-in box on the product page).
After adding a row, you must use the column. Notice that a column is created along with creating a row. To change the width of each column, go to the settings section of the same column.
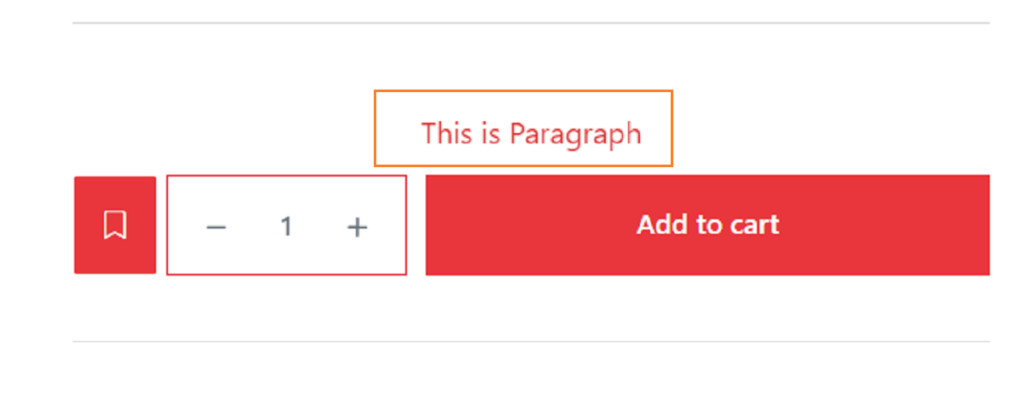
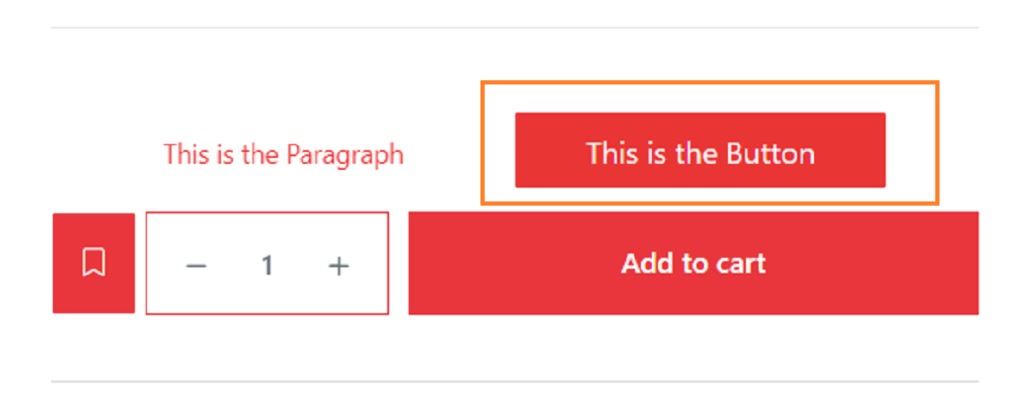
Using this option, you can create your desired paragraph and change its text through the settings section.
You can create more buttons for your product page. Just create a column and drop the button field into the column and set its URL through the general settings.
5- Image:
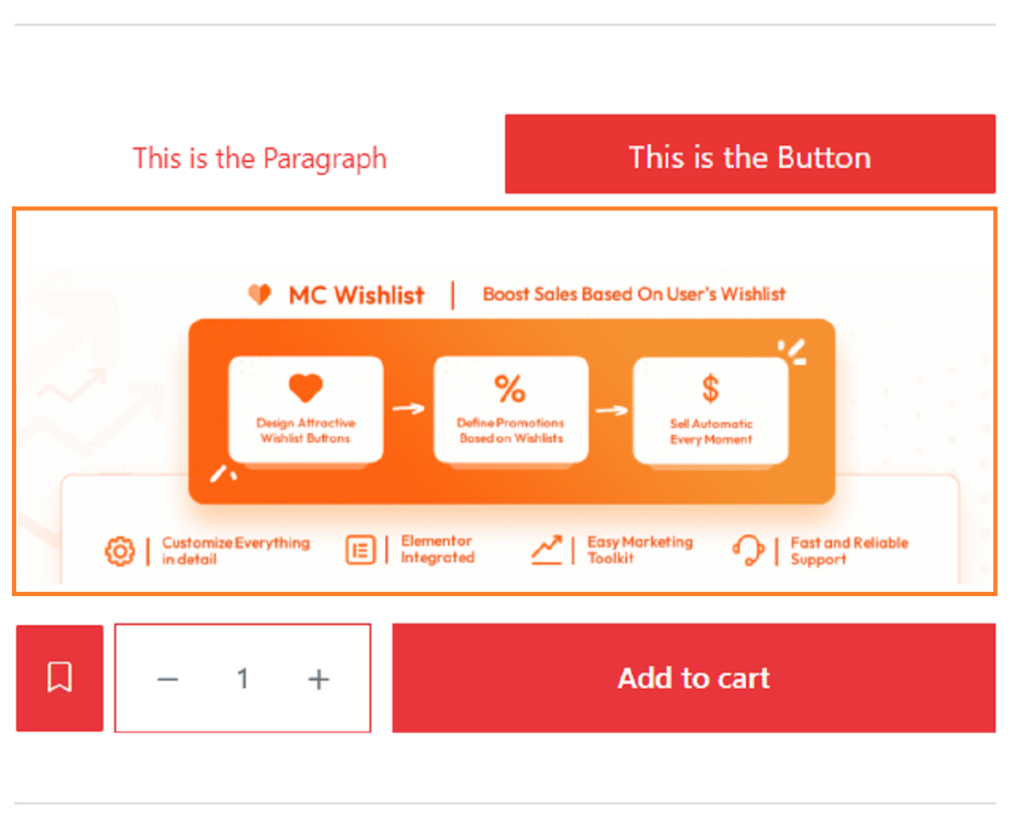
You can add any photo you want to your product page by creating a column and dropping the image from into the column.

The settings in this section are different from the previous one. The options you see here are related to the type of field as follows:
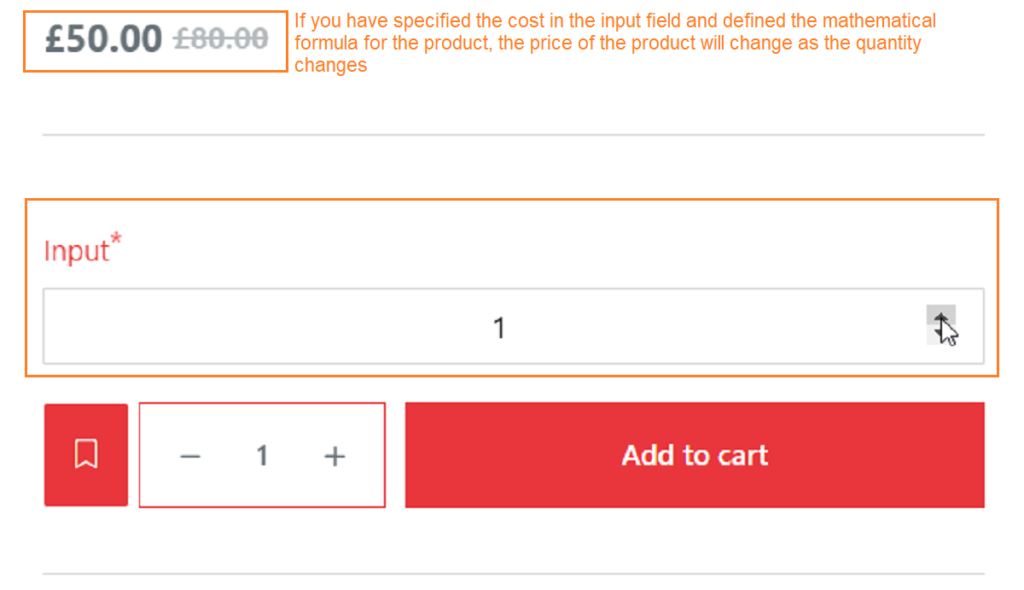
You can create and customize your input field in this section. It can be created in three modes (string, number, decimal) which you can choose from the main settings section.
You can use this option to create a field to receive text from the user.
You can add your own select box for your product page. Notice that you can assign a different price to each of the select box options through the settings of the secondary options.

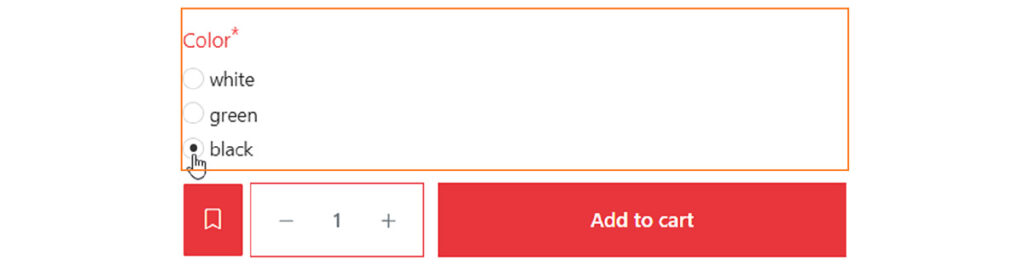
You can create your own radio input type. For this field, you can also define a different cost for each option like the select box.
For this field, you can define a different cost for each option like the previous two fields. Their main difference is that the user can choose several options in this section.

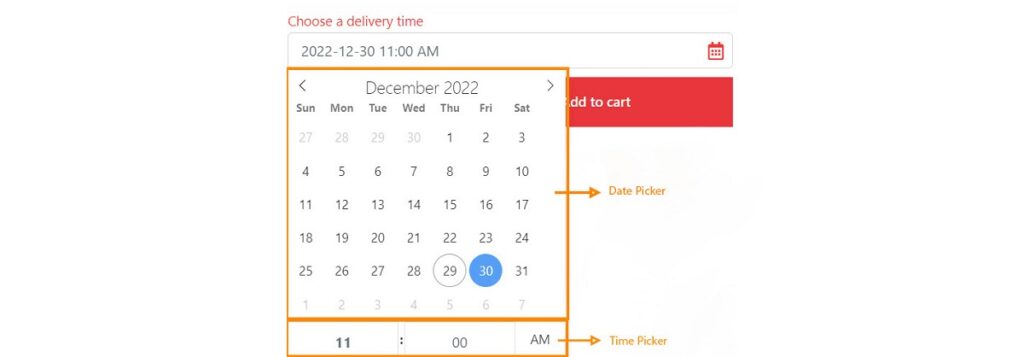
With this field, you can provide the user with the possibility to choose a date. This field has three types for choosing a date (single date – date range – choosing several dates together). You can also activate Timepicker from the main settings section.
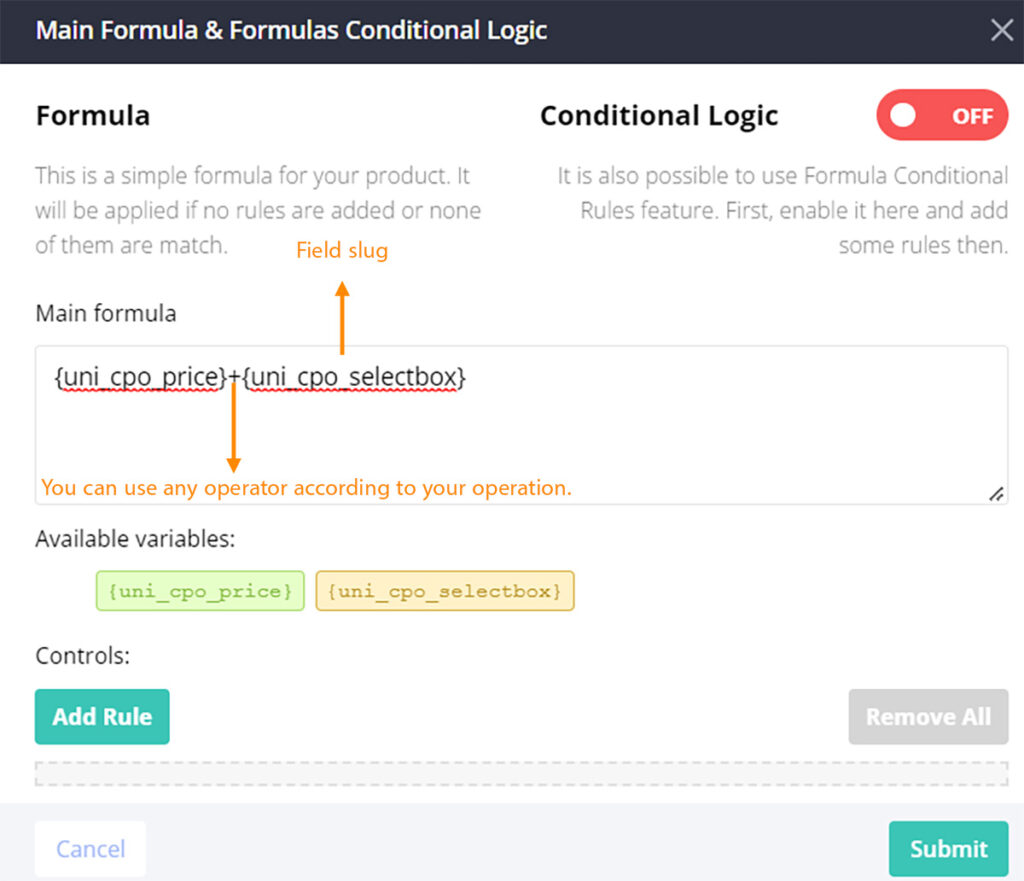
According to the fields you use, if your field changes the price of the product, you must also set the calculation formula.
To set the formula, go to CPO builder > Formula and conditional logic section.
We saw that it is easy to add a wishlist button in WooCommerce custom product options. At first, using the Mc wishlist plugin, we add the add to wishlist button to the single product page and make the settings for the button.
Then, using the Uni CPO WooCommerce Options plugin, we create a row and add the required number of columns and add all the additional fields we need for the product page. Then we make the corresponding settings for each field and finally set the mathematical formula to calculate the price.
As we can see in the picture, all the fields work with the wish list without any problems and are added to the wish list page.
These two reviewed plugins work well with each other and solve all our needs together. On the other hand, their coordination increases the beauty of the product page and attracts the user with custom options.
Considering all the mentioned issues, using these two plugins together is the most complete way to add additional fields to a single product page.